
Starting a home photography studio can be a fun and rewarding way to make some extra money, or even turn your passion for photography into a full-time business. However, there are a few things you need to know in order to set yourself up for success. In this blog post, we will discuss everything you need to know for a home photography studio set up for beginners
First let me say that you don’t need a bunch of expensive photography gear in order to start a home studio. In fact, all you really need is a camera, a lens, and a few basic pieces of lighting equipment. However, if you want to produce high-quality images that will wow your clients, there are a few additional items you should consider investing in.
In this article, I’m going to show you all the things that you need to get started on a budget, and then I’ll share a few items that will help you take your home studio to the next level.
So, let’s get started!
The first thing you need to do is decide what type of photography you want to specialize in. This will determine the type of gear you need to invest in. For my examples, I’m going to show you what you need to set up a corporate headshot photography studio did you can run as a business, but the advice, but also apply if you are doing something like portrait photography. I’m also going to assume that you want to run this as a business, and not just a hobby. With all, that being said, let’s get started.
Studio Location
The first thing that you need to decide on is where you are going to be doing your photography sessions. For this, I would recommend that you choose the largest room in your house or apartment. This is going to give you the greatest flexibility with working with lights, tripods and other equipment. Do you want your client to be as comfortable as possible and having some room to move around he’s going to help in this. This doesn’t mean that you can’t set up a home photography studio in a small room. You can get really creative with the layout, to make use of practically any space, but if you start with the largest room available, it’s going to be helpful in the long run.
Backdrops
Walls
One of the most basic requirements is going to be a backdrop of some kind. Luckily, you have a lot of options available to choose from. If you have a plain white wall, this will do fine as a backdrop. Something to keep in mind is that you want the wall to be pure white. This is going to help you when setting your weight balance so that your photographs have the right white balance. If your wall is not perfectly white, and you have the option to paint it, I would recommend doing so. Just head to your local hardware store and ask for neutral white or pure white in a matte finish. The finish is very important because you don’t want a shiny surface so make sure that the paint has a matt finish.

Fabric Backdrop
Another popular type of photography backdrop is the fabric backdrop. This is usually made up of a material called muslin. This is inexpensive and comes in various different sizes and colours. I would recommend sticking with whites, greys or black. These three colours are classical colours that don’t age or go out of style. The advantage of fabric backdrops is that they can be transported very easily. All you have to do is for them and they pack down to a very small size.
The main problem with fabric backdrops, is that they tend to get wrinkles that have to be ironed out before you can use them. This can be time-consuming and not practical, but if you need a solution that is easily transportable, this may be the one for you. If you are going to invest in a fabric backdrop, also consider a steam iron. These will come in very handy to steam out wrinkles out of the fabric.

Seamless Paper Rolls
Seamless paper rolls are probably the most popular type of photography backdrops used in studios. They are inexpensive, they come in different colours and sizes and most importantly, they don’t wrinkle like the fabric backdrops. Unlike fabric, backdrops, paper rolls can get dirty, scuffed or torn. When this happens, you just tear out the bad section and roll down some fresh paper. There are many companies that make photography paper rolls, so you are really spoilt for choice but if you want to get the best, then you should consider the following brands.

Computer
A computer is essential for editing your photos, but you can also play a roll in capturing the photographs. Shooting tethered is the most efficient way to get the photographs onto your computer as they are automatically transferred when you take the photo. This is done by connecting the computer to the camera set up. Using this setup, the photo files will be transferred automatically to the computer, it will also give you the ability to use the computer screen to view your photographs as you are capturing them. This means that you won’t have your client looking add a tiny screen on the back of your camera when reviewing the photographs. You can also set up your computer to automatically apply presets to the photographs to give them a specific style. This does not mean that you need to have the latest and greatest computer. In my case, I have been using a 10-year-old Mac running Lightroom and it never lets me down. If you’d like to know more about shooting tethered, check out the video below.
Tether Cable
If you are going to be shooting tethered, I would recommend that you purchase a professional tethering cable. Normal USB cables are not reliable enough to use in a studio scenario. Cables such as the Tethered Tools cables are specially made for shooting tethered and are very reliable. They are also bright orange which can help to prevent people tripping on them.

Camera
One of the things that I hear often is that you can’t work as a professional photographer, unless you have a big, expensive camera. This could not be further from the truth. I would feel confident that I could produce photographs using a 15-year-old digital camera that you could not tell apart from a modern camera. This is because the camera is one of the least most important things to worry about. As long as you have a camera that you can connect to a computer and a lens that matches your style of photography, I feel confident in saying that you could use any camera and work as a professional photographer.
Lights
When it comes to lights, you have a few options available. I will cover them all separately, but I will say, that I have used all of these in commercial photography projects.
Natural Light
Natural light is one of the most beautiful lights that you can use as a photographer. The reason that most photographers do not use it, is that they don’t have access to it. If you have a large window that lets in a decent amount of light, this may be all that you need to get your business as a photographer started. Even today, with all the equipment that I own, if there is a window available, that will always be my first option with lighting my subject. All you need to do, is the diffuse the light to make it nice and soft wraps around your subject. There are some considerations that you need to keep in mind when using window light. The first one and most obvious one is that you can only shoot during the day. The second thing that you need to keep in mind, is that during the day, the temperature of the light will change, and you will need to keep this in mind when shooting.
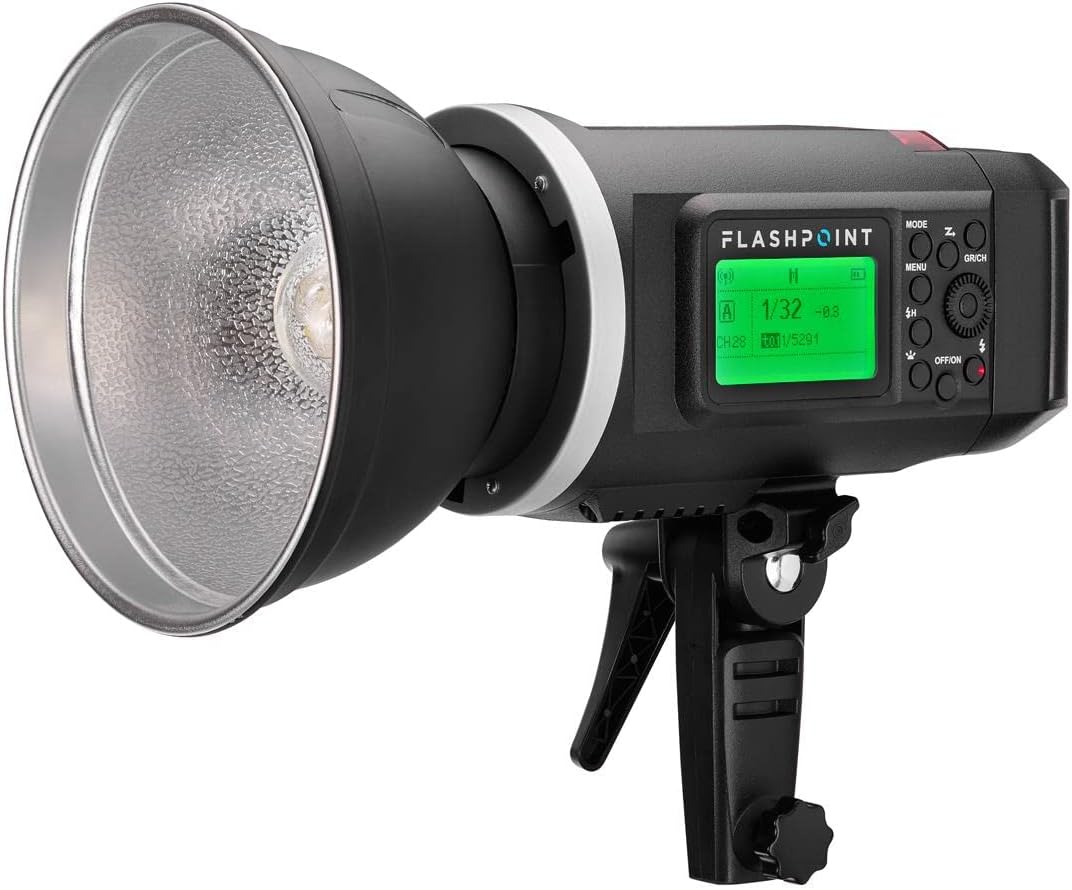
Flash/Strobes
Flash or strobes, are probably the most popular type of lights used in photography. Flash in a strobe are practically the same thing, except that Strobe is much larger and more powerful than a regular flashgun. Also, whilst you can mount a flash gun on top of your camera, strobe, needs to be mounted on a light stand. In order to use these types of lights, you will need a trigger. Please come in pairs and it’s a really good way to fire off the flash wirelessly. Luckily, there are countless brands producing these type of lights. You don’t need to spend a fortune. You can purchase some great lights for a relatively affordable prices. Some of the cheaper lights for the form, just as good as the expensive ones. The main difference is going to be in the build quality, but if you look after your gear, this should not be a problem. I have included samples of some of the gear that I use, and some of the cheaper options that you may want to consider. Any one of these will give you excellent results.


Continuous Lights
Continuous lights are a great option for a home studio. They are much more affordable than strobes, and do not need a trigger. The main difference between continuous lights and strobes, is that you can see exactly what the lights are doing. When using strobes, you can only see the results of your lights in the photograph that you’ve captured. When using continuous lights, you can move the lights around and see the effect of them on your subject. This can save you a great deal of time when setting up your lights. Another advantage is that you can use these types of light if you are going to be shooting video. Continuous lights, I’m not as powerful as strobes but in most cases this can be mitigated by raising the ISO of the camera. This could result in a little bit of extra noise on your photographs, but with modern versions of applications, such as Adobe Lightroom, you are able to remove most of the noise from your photographs during the editing.


Light Modifiers
Light modifiers are very common in a photography studio. They are used in order to change the shape and quality of light. The most common type of modifier is a softbox. These are very cheap, and they come in all shapes and sizes. They work by diffusing the light, which results in a much softer light that wraps around your subject. The idea when using light modifiers, is to make the light as large as possible, and to spread it over a larger area so that it can wrap around your subject. One of the most affordable light modifiers available is the photography umbrella. These can be picked up very cheap and they are widely available. Below are some samples of some of the more affordable, yet effective like modifies available on the market.


Tripod
When you are working with your subject to try and help them with posing, expression and everything else that goes into creating a really good corporate headshot, you cannot be worrying about where you put your camera down. Invest in a decent tripod so that you always have your camera in a safe place. Are you always said the tripod height to the same height? I’m going to be shooting my subject. This way, if I do put the camera on the tripod, it is always ready to go because it is pointing at my subject at the right height. This means that all I have to do, is push the button and capture of the image.

Other Bits
Lastly, I want to mention some items that are not specifically related to photography, but they coming really handy in the photography studio.
Gaffers Tape
Gaffers tape is a special type of adhesive tape. It is widely used in the photography and filmmaking industry because it does not live a residue. When you pull it off the surface, it is extremely adhesive and can pull paint of a wall should be mindful when using it.

Painters Tape
Painters tape should be used in place of gaffer tape when you need to apply it on a surface such as a wall and you don’t want to paint to peel off with the tape. It is also really handy to use to mark a spot where you want your subject to stand. Doing so, always insures that your subject is in the correct place so that the composition of your photographs, and the effect of your lights don’t change over your photography session.

Clamps
Clamps are super useful to have in your photography studio. You don’t need to buy your clamps from a photography supply store. Just head to your local hardware store and purchase them for half the price. There are 1000 different uses for clamps and they are really expensive, so make sure you pick up a few. I have used many different types of clamps, and the one listed below is the best one I found.

In summary, these are some of the essential pieces of equipment that you need in order to set up your home photography studio. Of course, there are other things that you can add to your studio, but these are the basics that you need to get started. So, what are you waiting for? Get out there and start building your dream home photography studio!